How to get a secret key
You can enable ChatGPT in WebClient to always have your personal assistant at hand. The process starts with creating a paid account on OpenAI. This step is important to obtain a secret key that will be used further on.
Note: Use only a paid account with enough credits otherwise ChatGPT may inform you that your current quota was exceeded and your questions will stay unanswered.
Creating an OpenAI account
If you do not have an OpenAI account:
-
Go to OpenAI platform and click
 .
. -
Enter your email and password. Fill in your details (name, surname, date of birth, phone number) and verify your email.
-
Upgrade your account by adding payment details.
-
Log in to your OpenAI account.
Getting Secret Key
To get a secret key:
-
Log in to OpenAI platform.
-
Go to Personal
 at the top right corner and click View API
  keys.
keys.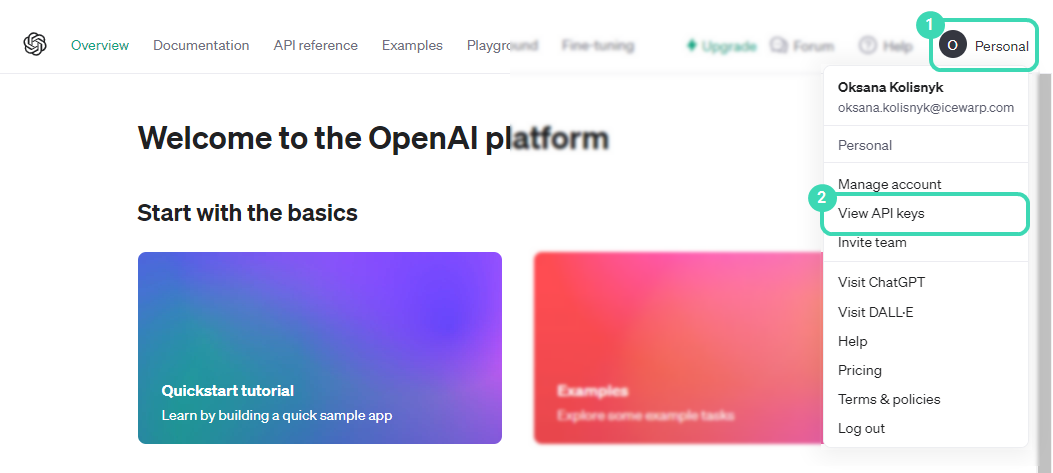
Figure. Personal dropdown.
-
In API keys view, click

 .
. -
Enter the name of the key
 and click Create secret key to confirm.
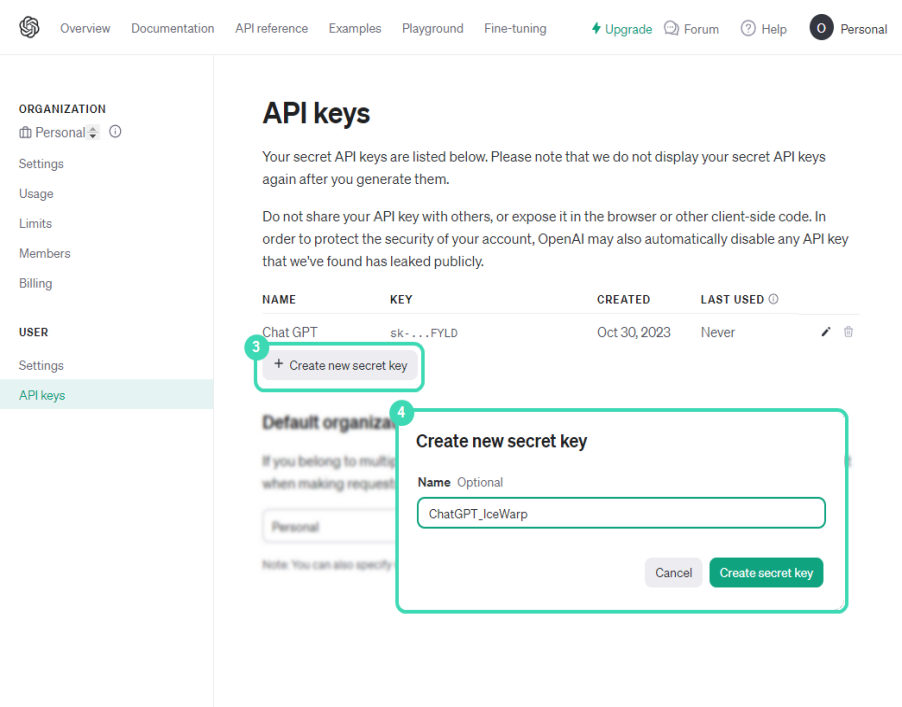
Figure. API keys view.
-
Click
 to copy your secret key
  . This is the only time you see the full secret key. If you want to share it, store it in a file.
 Note: If you have not copied the secret key and you have closed the window, create a new key.
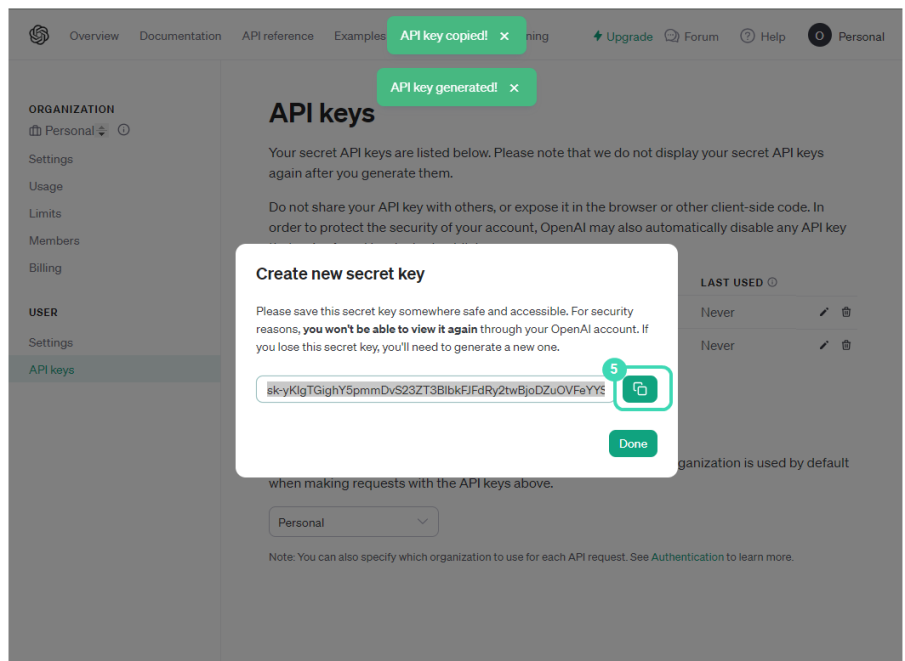
Figure. Copying secret key.
-
Now you can enable ChatGPT in your WebClient (see How to enable).
Click here to watch the video tutorial.

